
Create and Print a Booklet in InDesign
In order to create a booklet in InDesign, you must also know how to create a printer spread for professional printing. For example, if you are creating an 8 page booklet, the pages appear in sequential order in the InDesign layout window. However, when printed as a printer spread, page 1 is positioned next to page 8, page 2 is positioned next to page 7, and so on. This makes it so that when the pages are printed on the same sheet, folded, and collated, the pages all end up in the correct order for reading. This way, it is easy to work in normal Layout Spread in InDesign, where the pages are ordered sequentially, and then utilizing the Printer Spread just before printing.
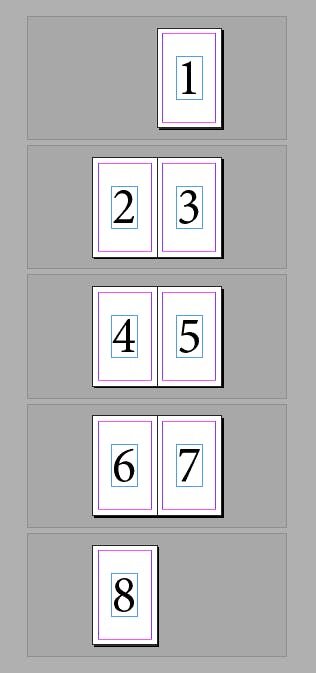
The following instructions explain how to create an 8 page booklet printing double sided on 8.5×11” paper in InDesign. In this example, each “page” occupies half of the letter size paper.
To Start a New Booklet:
1. After opening InDesign, choose File. From there you will select New and then start a Document. Provide the Number of Pages.
2. Next, select Facing Pages: this will give you left and right hand pages in your InDesign document.
3. Choose your page size. For this project, we are using: Letter – Half (5.5×8.5” for your Page Size). To set up the page orientation correctly, set orientation to Portrait.
4. It’s time to set your margins. Under Setting the Margins, choose .5” all around.

5. Under Number of Columns, select Type 1.
6. You’re ready to start designing your Indesign booklet! Click Create to complete the InDesign booklet setup and begin working on your document!
Now that you’re created your InDesign booklet, it’s time to print. The following instructions explain how to print as a booklet after you have set up and worked on your Layout Spread.
To Print a Booklet:
1. Open your document in InDesign and, under File, choose Print Booklet.
2. Under the Print Preset drop down menu, select Default. Choose your Booklet Type. We recommend 2-up Saddle Stitch.
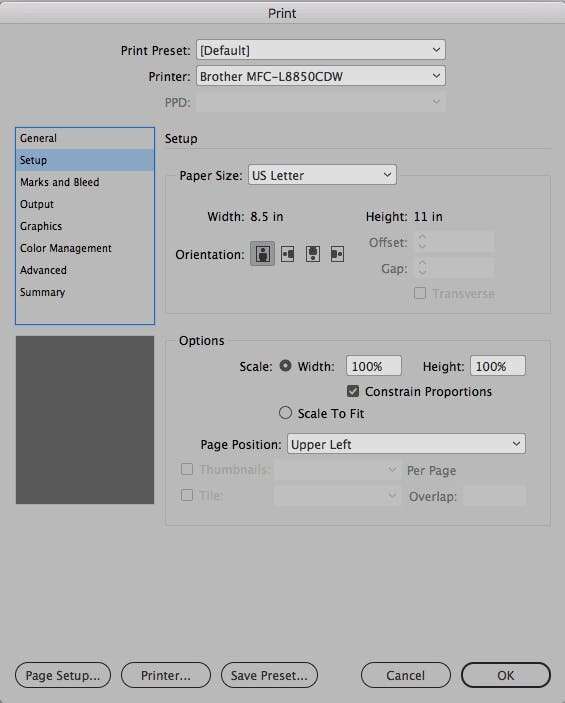
3. At the bottom of the window, select Print Settings. Click the Setup menu from the left hand column. Check your paper size and page orientation. This should be US Letter landscape, which means 2x half letters side by side.
4. OPTIONAL: Select the Marks and Bleed menu to uncheck marks and bleeds unless you plan to trim your printed booklet.
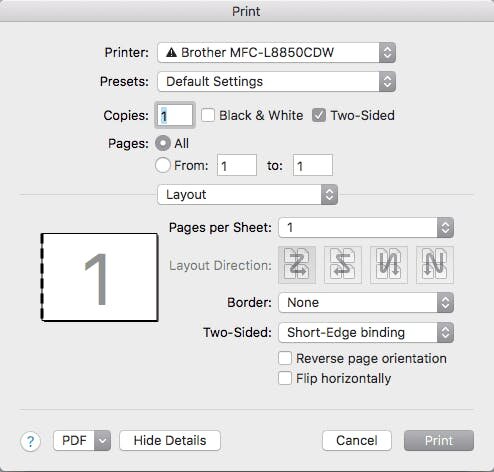
5. Click Printer at the bottom of the window. Select Show Details and choose Two Sided. Next select Layout and choose Short Edge Binding. Then click Print to apply those setting changes (this will not send to print yet!).
6. Click OK from the second Print window to finish applying setting changes (still will not send to print!).
7. From the Print Booklet window, select Preview in the left column to check the formatting.
8. Double check that your preview looks how you want your booklet to print. Once you are satisfied, click Print. Admire your beautiful InDesign booklet, you InDesign master!