
5 Steps to Setup Automated Rules for Google Ads
Automation has become a big part of our lives and a big part of marketing. Google Ads is no different, it is built on automation. Google is set up to use automation and algorithms to help your ads be as effective and efficient as possible. But there is more you can do on the platform to help you manage your paid ads.
Have you ever had sale ads running, but they ended at an inconvenient time, whether during a holiday or after store hours, and your only solution was to turn off ads the next day? Well, there is an easier way to pause your ads and not waste any of your media dollars. Meet automated rules! Automated rules are an easy and effective way to let the ad platform do the work for you.
In Google, setting rules is simple. Here are the five steps to set up automated ad rules:
Go to tools and settings in the top toolbar. Under Bulk Actions click on rules. In this section, you will be able to apply new rules, see what current rules are in place, and which rules ran in the past.


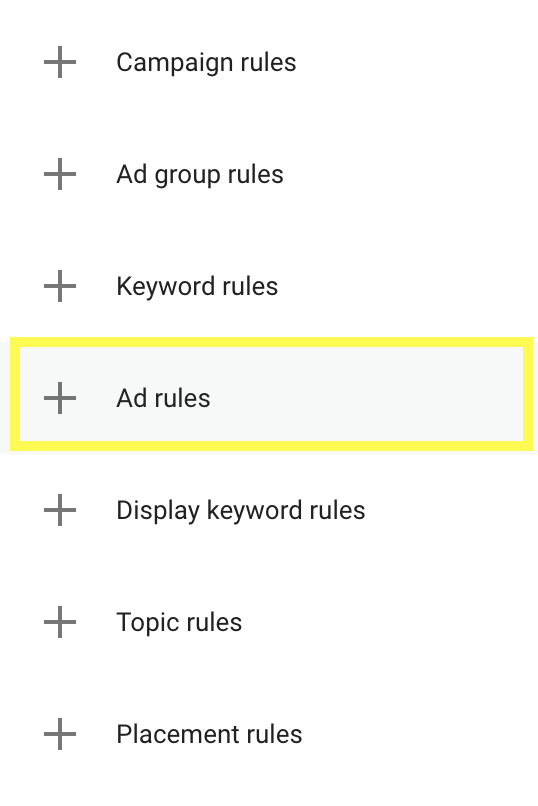
2. While you are in rules, click on the blue plus button, and a drop-down menu will appear with all the different rule options available. For this example, we will click on Ad rules.
3. Now, this is where you will be able to set all the parameters of your rule. This is where you can set when you want your rule to run, how often it needs to run, and even what kind of action you want (turn an ad on or off).

4. Once all the settings are in place, click Preview at the bottom to ensure everything looks correct before you save, and run your rule.
5. Click Save and now your rule is set and ready to run.