Connect Your Klaviyo Email Account to Facebook Ads Manager & Create High Performing FB Audiences with Data Syncing
If you are a direct to consumer marketer, or an agency that helps manage digital marketing, a key part of your marketing efforts is sharing data across platforms. In this example, we will show you how to connect Klaviyo to Facebook Ads, and once connected, tips to share data in unique ways and improve your audience targeting on social media.
Here’s how you connect Klaviyo email to Facebook Ads to share data across platforms:
Steps to Connect Klaviyo to Facebook Ads:
Go to Klaviyo.com and login. You must have admin rights to attempt this, so ensure you have that first.
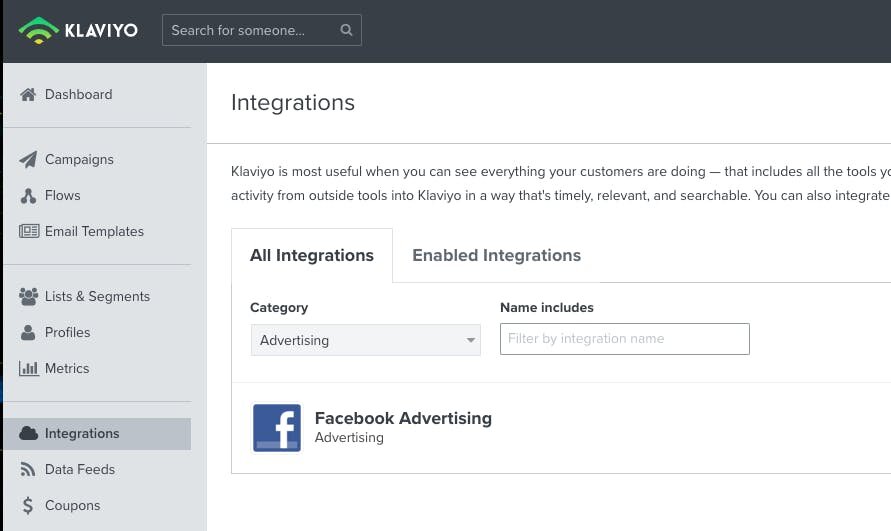
Once logged in, choose Integrations from the left hand menu. Then choose the All Integrations tab, and Advertising from the drop down menu. You are looking for Facebook Advertising.
Choose Add Integration on the far right.
You will then see a new screen where you get the 2 main benefits of connecting Klaviyo to FB Ads: 1) Custom Audiences and 2) Lead Ad Integration.
Choose the big blue button.
You will need to be logged in with a Facebook Ad account that you also have admin rights to on the business.facebook.com platform. Choose to Continue as the account you are logged into on FB.
Once you do this, you will be kicked back to the Klaviyo interface. Choose your ad account from your list of accounts that matches your Klaviyo client.
Congratulations, you’ve connected your Klaviyo account to your Facebook Advertising account.

Data Sharing & Audience Creation
While it is wonderful you have now connected Klaviyo to FB, you need to actually start syncing lists and segments in Klaviyo and start creating custom audiences in FB using your Klaviyo email data. Here’s how you get started with custom audience creation:
Steps to Target Klaviyo Audiences & Lookalikes on FB
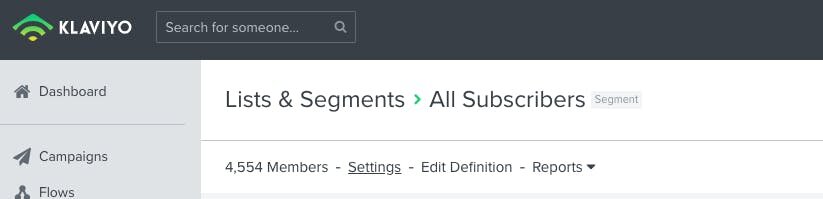
In Klaviyo, go to an of interest. Click it.
Now choose Settings in the sub nav bar.
Once the page refreshes, choose the blue text that says and create a new audience, with a name of your liking.
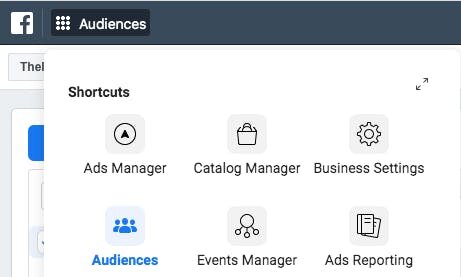
Navigate to business.facebook.com and login.
Choose your account and then choose our Audiences in the left hand nav.
Once this audience page loads, you should see your new audience available there at the top of the list.
If you want to start targeting this simply choose it in your ad set when building your campaigns.
We recommend also creating a Lookalike of the audience for prospecting new customers. Choose the name, and then in the top right of the flyout window where it says Actions, choose Create Lookalike.
Now you can start targeting those lookalikes in your ad sets as well. Congrats!


Take It to the Next Level
You will need a large email list to really leverage your customer data on FB, as there is about a 1000 user match minimum to start targeting your audiences. If you have an email list in the 10’s of 1000’s, we recommend creating segments based on different user attributes and then share those with FB to retain existing customers and make lookalikes to find new customers that are similar in traits.
Here are some classic, top performing segments to utilize:
Top customers by revenue (i.e. top 10%)
Top customers by number of orders
Customers that click emails more than 3 times, but haven’t bought in 60 days (close to converting)
Customers that have not bought in a year (win back list)
Customers that open emails at a higher than average rate, but have not purchased yet
Customers that are in a relevant geography, i.e. southern coastal states you could start showing swim or summer wear early
As you can see, there are so many ways to spin this. Have fun, give it a shot, and when in doubt, test it out!